
How to Turn One Plant Into a Dozen for Free
A cutting is a piece of stem persuaded to grow its own roots. It costs nothing, takes about ten minutes, and gives you a plant genetically identical to the one you took it from.
For herbs like rosemary, thyme, sage, mint and lavender it is by far the easiest way to get more plants, and much faster than seed. The technique is simple and the failures nearly always come down to the same two things: where you cut, and how wet you keep it.
Where you cut matters more than how
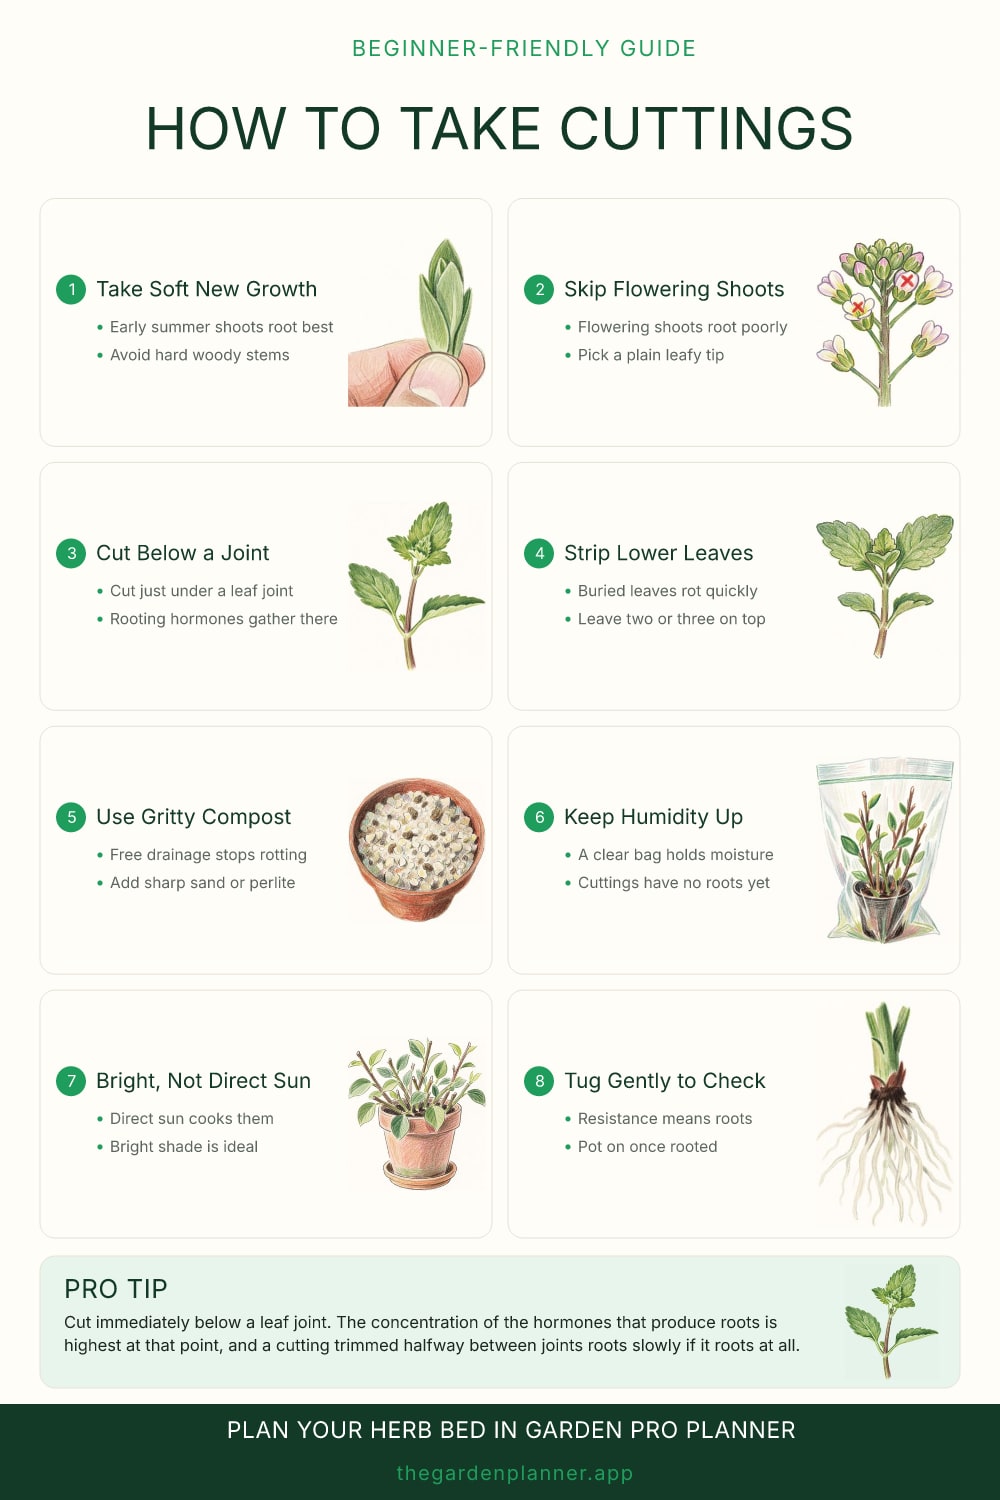
Cut immediately below a leaf joint, the point where a leaf or pair of leaves emerges from the stem. That node is where the plant concentrates the hormones involved in producing roots, and it is also structurally denser and less prone to rotting than the hollow stretch between nodes.
A cutting taken with three inches of bare stem below the lowest node is much slower to root and much more likely to go slimy and collapse. Use something sharp, because a crushed stem end struggles. A clean pair of scissors or a craft knife is fine.
Choose the shoot carefully too. You want soft, new, actively growing tips, roughly the top three or four inches, taken in late spring or early summer. Avoid anything with flower buds on it. A shoot that is committed to flowering is spending its energy in the wrong place and roots reluctantly. If the only shoots available have buds, pinch them off and wait a week or two for the plant to push new growth.
The humidity problem
This is the central difficulty of a cutting. It has leaves losing water and no roots to replace it. Everything about aftercare is a balancing act between those two facts.
So reduce the water it loses. Strip the leaves from the lower half of the cutting, both because buried leaves rot and because fewer leaves means less water loss. If the remaining leaves are large, cut them in half across. Then raise the humidity around it: a clear plastic bag over the pot held up on a couple of sticks, a cut-down plastic bottle, or a propagator lid all work. Keep it out of direct sun, because the inside of a covered pot in full sun gets hot enough to kill the cutting quickly. Bright shade is what you want.
At the same time, keep the compost only just damp. Wet compost has no air in it and the cut stem end will rot before it roots. Gritty, free-draining compost, roughly half multipurpose and half sharp sand or perlite, is much more reliable than rich potting compost.
How long, and how to tell
Soft herb cuttings often root within two to four weeks in early summer. Woodier things take longer, sometimes a couple of months. The most common mistake at this stage is impatience, specifically pulling cuttings out to look at them.
The non-destructive test is a very gentle tug on the top of the cutting. If it lifts freely, nothing has happened yet. If it resists, roots have gripped the compost. New growth appearing at the tip is also a reliable sign, though it can lag a little behind the roots themselves.
Take more cuttings than you need. They cost nothing but a few minutes, and a strike rate well short of a hundred percent is completely normal even for experienced gardeners. Six cuttings to get three plants is a fine outcome. Put several around the edge of one pot rather than one per pot, since they seem to do better with company and it saves space on the windowsill.
What to do once they root
Once a cutting has clearly rooted, start ventilating it. Open the bag or prop the lid up for a few hours a day for a week, so it adjusts to normal humidity gradually rather than wilting the moment you uncover it. This is the same principle as hardening off a seedling.
Then pot each one into its own small pot of ordinary compost. Do not go straight into a large pot, because a small root system in a big volume of wet compost tends to rot. Grow them on somewhere sheltered until they have filled that pot with roots, and plant them out when they are properly established. Cuttings taken in early summer are usually ready to plant in autumn, or can be overwintered somewhere frost free and planted the following spring, which is the safer option for anything tender.
Pro tip. Cut immediately below a leaf joint. The concentration of the hormones that produce roots is highest at that point, and a cutting trimmed halfway between joints roots slowly if it roots at all.